I’m in a lucky position that this blog ranks very well on search engines which leads to a high amount of daily visitors. In addition, I have a lot of beginner tutorials on this blog. As a result, I get a lot of emails, many of them are about how to get started with Arduino, sensor/actuators, etc.
Unfortunately, I get many more emails/messages than I can answer. That is why I started this article to address some of these questions. This article has been written especially for those readers who are just thinking about starting with the Arduino ecosystem or electronics (e.g. ESP8266, ESP32,…).
Why do you want to start with Arduino/Electronics?
Before you start, maybe think about why you want to start with electronics. Besides my professional life, I acquired some skills in other disciplines, such as construction knowledge, woodworking, 3D printing etc. If I order all these disciplines by how often I really need to apply them, then electronics is maybe the one I could spare most. Don’t get me wrong, in my spare time, I do often electronics and I like it… but it would not hurt me in terms of life quality or financial savings if I just stop. For example, we are currently refurbishing our house, so my construction skills come in handy. In addition, I build many furnishings (table, lamps, shelves,…) myself, so I do also woodworking a lot. I guess, all the money and time I spent to improve my construction and woodworking capabilities (e.g. by buying new tools) did payback multiple times in improved life quality and/or financial savings.
I’m note sure if this applies also to my activities related to electronics and the Arduino ecosystem. The main reason why I started was to deepen my knowledge in sensors and actuators. My main background has been computer science with a strong focus on software architecture/engineering/development – but I always intended to go into “hardware engineering”, too. So, when I started with electronics, it had already been clear to me, that gaining knowledge in electronics will be part of my life for a long time. Therefore, I probably spent a bit more money on my “initial equipment” than I this article will suggest.
Getting to the point: the recommendations in this article address especially readers that do not know for sure if they will stick with electronics for a longer time frame. In my opinion, in such cases it makes no sense to spent a lot of money to get started. The good news is that starting with the Arduino ecosystem is not very cost-intense. There are excellent starter kits available for less than 25$. If you already know that you will stick with electronics for some time – like in my case, then it can make sense to spend a bit more on a starter kit.
What do you, as a person, need to start?
Naturally, it will be beneficial if you have already acquired some basic knowledge in electronics. Moreover, it also helps if you have someone around that can help you if you get stucked (e.g. uncle or aunt who is familiar with the basics of electronics). Nonetheless, if you have no experience at all, but are motivated enough to learn the ropes, you will very likely succeed. There are so many video or written tutorials around, so there is almost no excuse to not get started.
What software do you need?
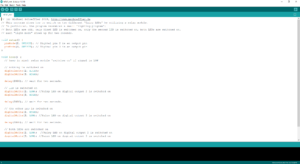
The Arduino IDE is basically everything you need to get started. Fortunately, the Arduino IDE is available for free. There are very good alternatives available that are also for free, e.g. PlatformIO. But I recommend to start with the Arduino IDE, as its widely used and very easy to understand. If you are missing some advanced features, you can always go to another software platform.
What hardware equipment do you need?
As a starting point I recommend to aquire a breadboard, some jumper wires and, of course, an Arduino. In addition it makes sense to buy also some resistors and LEDs and a switch in order to implement very basic use cases.
Basic equipment to start with:
Breadboard
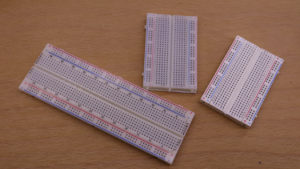
Breadboards are perfect prototyping platforms for making circuits. The main advantage of breadboards is that soldering is not required in order to integrate components into a circuit. In particular, many components can be just placed onto a breadboards. This makes breadboards the perfect choice for prototyping or testing (new) components. The drawback is that breadboards are not the best solution when it comes to permanent applications. Especially, if the breadboard gets moved or shaken around, components might come loose. Nonetheless, they are the perfect starting point for beginners.
When buying some breadboards, I don’t recommend to buy cheapest ones. Once or twice I bought a batch of breadboards for a very low price. Unfortunately, the quality turned out to be not really sufficient, as wires and legs of components did not stick well into the exposed holes of these breadboards. Therefore, I recommend to buy rather 3-5 more expensive breadboards (or with good customer ratings) than 10 cheap breadboards. Starting with one breadboard is also fine. But, in order to preserve a project for some time, it makes sense to have multiple breadboards.
In most cases, the standard size of about 5.5 cm x 8.5 cm / 2.2″ x 3.4″ is fine. Though, I recommend to have at least one larger breadboard (5.5 cm x 17 cm / 2.2″ x 7″).
Jumper Wires
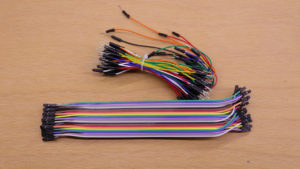
Jumper wires (also called jump wires) are electrical wires with connector at each ends. There exists three types of different jumper wires in terms of their connectors: female/female, male/male, and female/male. The male connectors fit perfectly into the exposed holes of breadboards. Jumper wires are the connection elements when it comes to implement a circuit on a breadboard. In other words, jumper wires are used to connect electrical components in order to form a circuit.
Jumper wires are available in different lengths, where lengths of 10 cm and 20 cm are very common. In many tutorials – also in mine, black is used for GND and red for 5V. When you plan to use the same color scheme and start to wire, you will shortly recognize that you need black and red more often than the other colors. For this reason, I bought extra batches of just black and red wires.
Arduino (+USB cable)
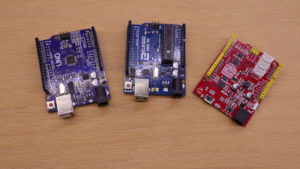
I guess, for many people, Arduino is just the Arduino Uno R3 Single-board microcontroller. But actually, there is more to it: there is the integrated development editor (IDE), the company Arduino LLC, the website arduino.cc, etc. Therefore, I see Arduino primarily as an ecosystem with a hardware platform targeting on prototype projects.
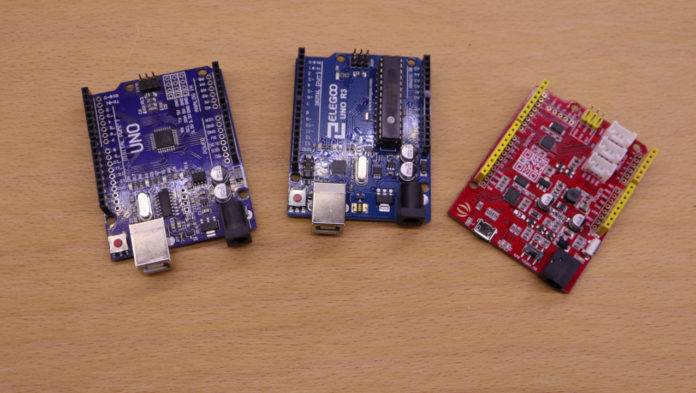
Anyway, to get started you need to pick a hardware: There exists many variants, such as the popular Arduino Uno R3, Arduino Nano, Arduino Mini etc. When starting, I would go for a “normal” Arduino Uno R3. The reason is that it is widely used an especially beginners do not get confused when copying/adapting from existing wiring diagrams.
If you decided for an Uno R3, the question is which one to buy? I own around ten Arduino Uno R3s ranging from 1$ (noname from Aliexpress) to around 25$ (original Arduino). The “original” Arduino made in Italy is for sure of high quality, but also very expensive. Especially, when considering the Arduino Uno R3 is almost 10 years old. From a price point, I recommend Arduinos in a price range between 7-15$. If you plan to use only the analog inputs and digital inputs/outputs, then you are probably fine with a cheap Arduino. At least I had many problems with cheap Arduinos for application in which SPI, I2C or serial connections were used.
Besides the Arduino Uno R3 type, I can also recommend the Arduino Nanos. They are very compatible with the Arduino Unos and they fit perfectly on a breadboard. Especially, if you do some prototyping over a longer time frame, it makes sense to use a Nano in order to have everything on a single breadboard. Btw. make sure that the Arduino comes also with a USB cable if you don’t have one at home. The Arduino Uno has a USB B input and the Nano has a USB Mini input.
LED + 1k Resistor
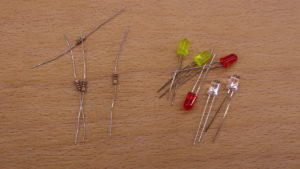
LEDs (light-emitting diodes) are perfect when you need output components that you want to control with an Arduino. LEDs can only emit light if wired correctly: GND is connected to the cathode (short leg) and the 5V signal to the anode (long leg). Moreover, LEDs require a resistor. You can either use Ohm’s Law or stick with the 1k rule of thumb (“1k works always, except in 1 out of 1000 cases”). If you are interested in more details, I made a tutorial about how to let an LED blink with an Arduino Uno.
Switches
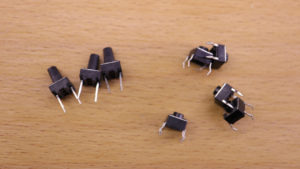
Switches are perfect as “input components” for starters. They are very simple to use as pressing a switch will result in a HIGH signal and releasing the switch in a LOW signal (sometimes it’s also the other way around). For the first batch of switches, I recommend the ones that fit directly on a breadboard. The main advantage is that you can use them without soldering.
Starter Kits
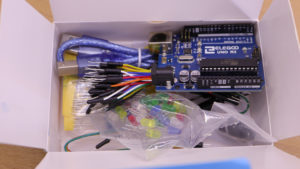
There are a lot of starter kits available which contain all of the previous components. Some days ago, Elegoo gave me their “Basic Starter Kit” for testing. In my opinion, it has a very good price-quality ratio and has contains the most important components. For these reasons, I can honestly recommend the starter kit (please see my Sponsorship Disclosure).
I did the basics, what’s next?
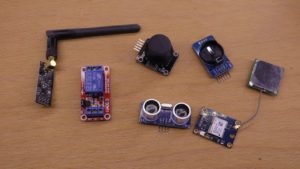
If you started with a basic kit and are asking for more now, or want to start more ambitious direct from the beginning, I recommend to just go for more sensors and actuators. In many cases, it is not possible to wire a sensor directly to an Arduino since additional hardware is required. Luckily, there exist tons of breakout boards which contain the sensor/actuator and the required hardware components as well. Often, breakout boards are also referred to as “name of sensor/actuator”-module, especially when searching them up on online shops. There are a lot of breakout boards available that can directly wired to an Arduino. If you look up my tutorials you can find many of them: For example, KMR-1.8 SPI (TFT Display), RDM630/RDM6300 (RFID Reader), GY-521/MPU-6050 (gyroscope+accelerometer).
Instead of buying each component individually, there is also the possibility to buy a kit with multiple sensor/actuator components. When I started with this topics some years ago, one of the first things I bought was also a kit with around 25 breakout boards.
What about debugging?
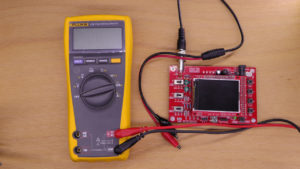
You will often come to point where you think that you code and wiring is correct but your application just does not work. Then it makes sense to find the cause (also referred to as bug) and to do some debugging.
The most basic approach is to use the Serial.print() function and add “print outs” to the code. This helps you to find software related problems, e.g. to check how often a for-loop has been executed etc.
Finding a problem related to the hardware can be sometimes more complicated. The probably most typical mistake is that the wiring is not correct. For example, if you mix up a 3.3V input of a component with a 5V signal, the components gets damaged, and then good luck finding the problem. A good start is always using a multimeter to check whether the voltage levels are as expected. Sometimes, an application is expected to change the voltage level based on a specific pattern, e.g. a LED is supposed to light up for two seconds, go out for two seconds, light up for to two seconds and so on. In such cases, oscilloscopes are the perfect tool as they can monitor the timing behaviour. Unfortunately, oscilloscopes are also very expensive. Luckily, there is the so-called DSO138 oscilloscope which is, in my opinion, the best oscilloscope in terms of quality-price-ratio. The DSO138 can be purchased for around 10-20$ but has everything you need for debugging typical circuits of Arduino applications.
What are alternatives to Arduino?
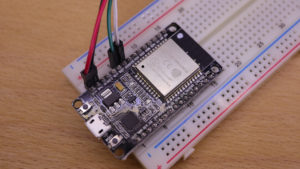
Since the start of the Arduino ecosystem more than ten years have been passed. But I think it is still one of the best systems for starting with electronics. If you look up for alternatives, you probably come across recommendations for ESP8266 and ESP32. The ESP8266 is a low-cost Wi-Fi microchip. In comparison to the Arduino Uno R3, it enables you to connect to a wireless network. Whenever you want to push data to a network or the Internet, the ESP8266 is a good choice. The ESP32 can be seen as a successor to the ESP8266 (more features, more performance, etc.). The good thing about ESP8266 and ESP32 is that they are very compatible to the Arduino ecosystem. For example, you can also use the Arduino IDE to program them. Additionally, a lot of libraries written for the Arduino do also work for ESP8266 and ESP32. If you know right from the start that you want to implement wireless application, that maybe go for a ESP8266 or ESP32. Alternatively, when you have acquired some experience with the “plain” Arduinos, the ESP8266 and ESP32 are the perfect platforms “for taking the next step”.
from the 28byj-48 stepper motor and arduino i am seeking primary way to connect. pardon me what country are you posting and working from . A United States person here.
thank you, Your bio did not mention the above interest [lease
Thanks for this as I am new to arduino.