A stepper motor divides a full rotation in multiple steps. As a result, a stepper motor can be driven much more precisely than a conventional dc motor. In particular, stepper motors are driven step by step. After having a quick look into the data sheet of a stepper, we know exactly how many degrees correspond to a single step of our motor. With this information, we can precisely turn the rotor of our stepper motor, since we then know how many degrees correspond to a single step.
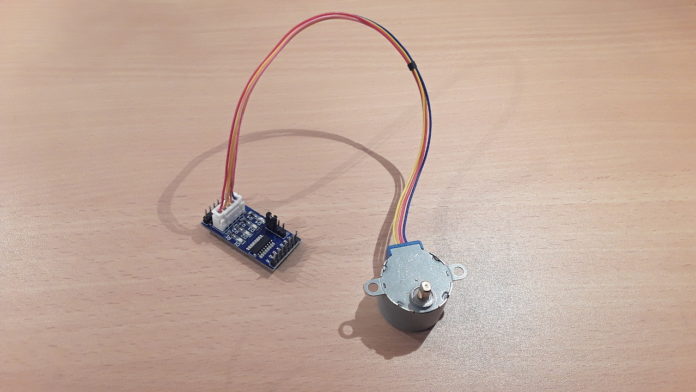
The 28BYJ-48 is a very cheap stepper motor that often comes with a ULN2003A driver board. Luckily, the Arduino platform has already a built-in stepper library that allows us to control the 28BYJ-48 stepper motor with the ULN2003A driver board. In this tutorial, it is shown how to control the 28BYJ-48 with an Arduino Uno.
List of materials:
Pin layout:

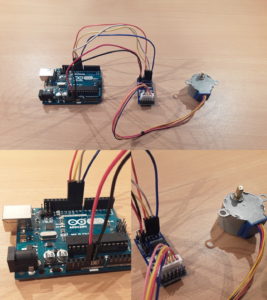
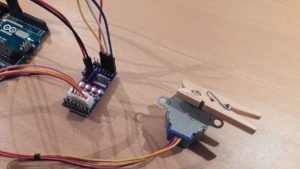
Typically, the 28BYJ-48 motor comes with a 5-pin connector that fits to driver board’s connector. The driver board has two pins for the power supply which are labeled GND and VCC. The board’s GND pin must be wired to the Arduino’s GND pin. Accordingly, the board’s VCC pin must be connected to the Arduino’s 5V pin.
Important remark: With this setup, we are powering the motor directly from the Arduino. The advantage is that this is the possible easiest solution for providing power to the motor. However, if the motor consumes too much power, the Arduino can be permanently damaged. If you use a different setup (driver, motor, source code, etc.), make sure that you do not draw more than about 300mA out of the Arduino. If you need more power, just use an external voltage supply for your driver board.
Lastly, the driver board’s IN1, IN2, IN3 and IN4 pins must be connected to the Arduino. In this tutorial, pins 8 to 11 of the Arduino are used (IN1<->8, IN2 <-> 9, IN3 <-> 10, IN4 <-> 11).
Example source code:
In the beginning, we include the header file of the Arduino plattform’s built-in stepper library. Then, we define the number of steps that the motor needs for one revolution. Stepper motors can turn out very complicated, therefore, it is not that easy to look up this number.
For example, you can typically drive stepper motors in different modes and, moreover, they have a specific gear ration. Both have an influence on the number of steps per revolution. Since we drive the motor in the so-called full step mode (control sequence with four steps), each step corresponds to a rotation of 11.25 degrees according to the data sheet. This corresponds to 32 steps per revolution (360° / 11.25° = 32). In addition, the manufacturer specified a gear ratio of 64:1 for this type of motor. Normally, this gear ratio must be multiplied by the 32 steps. If you examine the 28BYJ-48 in more detail, it turns out that the actual gear ratio is approximately 63.68395:1. Therefore we set the final number of steps to 2038 (32 * 63.68395=2037.8864).
Next, we initialize the stepper. The first parameter of the Stepper constructor is the number of steps. The other parameters correspond to the Arduino’s pins that we used to connect the ULN2003A driver board.
In the loop function, we start to drive the motor. First, we set the speed to one revolutions per minute . Next, we tell the stepper motor to do 2038 steps. As one revolution corresponds to 2038 steps, the motor’s shaft should move a full revolution in approximately one minute. Next, we set a delay of one second. Then, we do the same thing again. But this time, we set the speed to 6 rounds per minute and move the shaft in the other direction (by setting a negative number of steps). As the the shaft moves six times faster now, the motor should finish a full revolution in about 10 seconds (60s/6=10s).
// (c) Michael Schoeffler 2017, http://www.mschoeffler.de

#include <Stepper.h>

#define STEPS 2038 // the number of steps in one revolution of your motor (28BYJ-48)

Stepper stepper(STEPS, 8, 10, 9, 11);

void setup() {
  // nothing to do
}

void loop() {
  stepper.setSpeed(1); // 1 rpm
  stepper.step(2038); // do 2038 steps -- corresponds to one revolution in one minute
  delay(1000); // wait for one second
  stepper.setSpeed(6); // 6 rpm
  stepper.step(-2038); // do 2038 steps in the other direction with faster speed -- corresponds to one revolution in 10 seconds
}
Video Tutorial:


Dear Michael,
Thank you for this very clear tutorial and for the video.
My problem is how to initialize the initial angle of the stepper motor.
I understand when testing the device, that the system begin from the actual position of the servo to do the required angle, but is it possible to initialize the first position to 0 for example ?
I would like to know also if it is possible to run another program in parallel with the motion of the motor ?
My last question is: by using the library Stepper.h, is it possible to use more functions apart from the functions that you use in your program ? stepper.setSpeed(10); stepper.step(-2038/4); ?
Thank you
Hi Ben,
(1) a stepper motor and a servo motor are two different types of motors. While a typical servo motor “knows” its position by utilizing an in-built potentiometer, a typical stepper motor is not capable of “knowing” its current position. Therefore, it is not possible to initialize a stepper motor –
such as the 28BYJ-48 – to a given absolute position :(
(2) It is possible to run another program while controlling the motor. In this case, I recommend to get rid of the “delay” calls. Alternatively, timer interrupts can be used to control a motor at given times.
(3) Unfortunately, the Stepper library does not offer any more functions (Reference: https://www.arduino.cc/en/Reference/Stepper)
I hope my answers are helpful to you. Let me know, if I can help you any further!
Best, Michael
Dear Michael,
Thank you for your answer and for your great tutorials !!
Best regards
Hey Michael,
First, thank you for the awesome explanation!
Couple of questions though:
(1) Why is that the number of pins don’t go in order when you’re initializing the stepper?
What I found “everywhere” is: “Stepper stepper(STEPS, 8, 9, 10, 11);”
but your code says “Stepper stepper(STEPS, 8, 10, 9, 11);”
My motor works perfectly with your code, I just don’t know why! ^.^
(2) Again, everywhere I look, the data sheet included, mentions 28BYJ-48’s steps per revolution as 4096 (5.625deg step, 64 gear ratio).
and again my stepper works perfectly with 2038 steps in your code. whyyyy?
Thanks in advance,
Amir
Hi Michael, Thanks for the code example.
I am trying to run the motor in one direction continuously so I removed everything after line 15. However, the motor seems to get quite hot while doing this. Any thoughts on that?
I did read that this motor can be run with double steps so I upped the number of steps from 2048 to 4076 and halved the speed and it seems to get s little less hot. Wondering if you had any insights into this line of thinking?
Cheers!
Adon
Hello Michael,
Firstly, thank your the excellent tutorial. It’s been a great help. I have a question – I would like power the motor using an external battery. Could you offer any advice on what I would need to do this, please?
Many thanks,
Hi,
great dude.
please make tutorial 28BYJ-48 stepper motor with a ULN2003A + MPU6050.
to control the angle degree.
thank you,
Hsn
[…] Michael Schoeffler has a great article on using this stepper motor with Arduinos if you want a more in-depth explanation. As he points out there is also a caveat when connecting the motor directly to the Arduino for power supply. […]
Thanks for the article Michael. Have you tried the 28BYJ-48 stepper motor with STM32? Can you recommend any libs? (Is there any?)
I’ve bought this kit which has the same motor driver but my project involves using and controlling 4 6-9 volt dc motors. Will I be able to achieve this with the same motor driver?
Thank you!
The ULN2003 is best suited for steppers. Have a look at my tutorial about dc motors: https://www.mschoeffler.de/2017/04/02/how-to-control-a-dc-motor-with-the-arduino-uno-and-the-l298n-dual-motor-controller/
Nice tutorial. I modified the above program by changing the delay time to 5 seconds and commented out reversing the stepper. Increased the speed from 1 to 6 rpm. The stepper will rotate clockwise to one full rotation and pause for 5 seconds. After about five turns, the stepper seems to be loosing steps. It doesn’t reach its original starting position. It progressively gets worst.
Why would the stepper not return to the starting position every time?
Thank you,
Kerry
Dear Michale
How can I can make only 4 revolution with stepper motor 28byj-48
Rishav,
If all you want to do is 4 clockwise turns. Look at lines 13-19 of Michael’s code above. These are the void loop. Change the loop to:
void loop() {
stepper.setSpeed(4); // 4 rpm
stepper.step(2038*4); // make 2038 steps multiplied by 4. I.e., 4 revolutions in 1 minutes
delay(1000); // wait for one second
}
Enjoy!
If you only want 4 rotations then stop. put the above code in the void setup.
Dear Michael,
I am trying to use the 28bjy-48 stepper motor to control a model railroad turntable using a variable potentiometer To set the speed and push buttons to control direction.
The sketch that I have I got from model train catalogue. If I block out the push buttons the motor turns, however as soon as I include them the system does not work.
The push buttons are connected to pins 6 & 7 and the other side to ground.
I need help.
Regards,
Dennis
Dear Michael,
Thanks for the tutorial. I have a very basic question: In order for the 28byj-48 stepper to work, does it have to be connected to the Arduino, or one just use the Arduino to set the 28byj-48 stepper, and then it stands alone?
Thanks for your reply,
The Arduino (or another type of “control unit”) must be permanently connected to the stepper. It is not possible to just “configure” it and then let it run stand-alone.