
The Catalex 4-Digit Display is a module that enables to show up to four digits on an integrated 7-segment display. The module can be used for many applications, such as stopwatches, clocks or for simply displaying some debugging information.
There exist many similar modules that have the same functionality as the Catalex module. All of these modules have in common that they have a TM1637 chip. The TM1637 chip is a generic drive control unit for LED-based segment displays that can be controlled via a two-wire serial interface. TM1637-based modules are very popular within the maker community, since they are cheap and very easy to use.
This tutorial shows how to use the 4-Digit Display with an Arduino Uno.
Related products
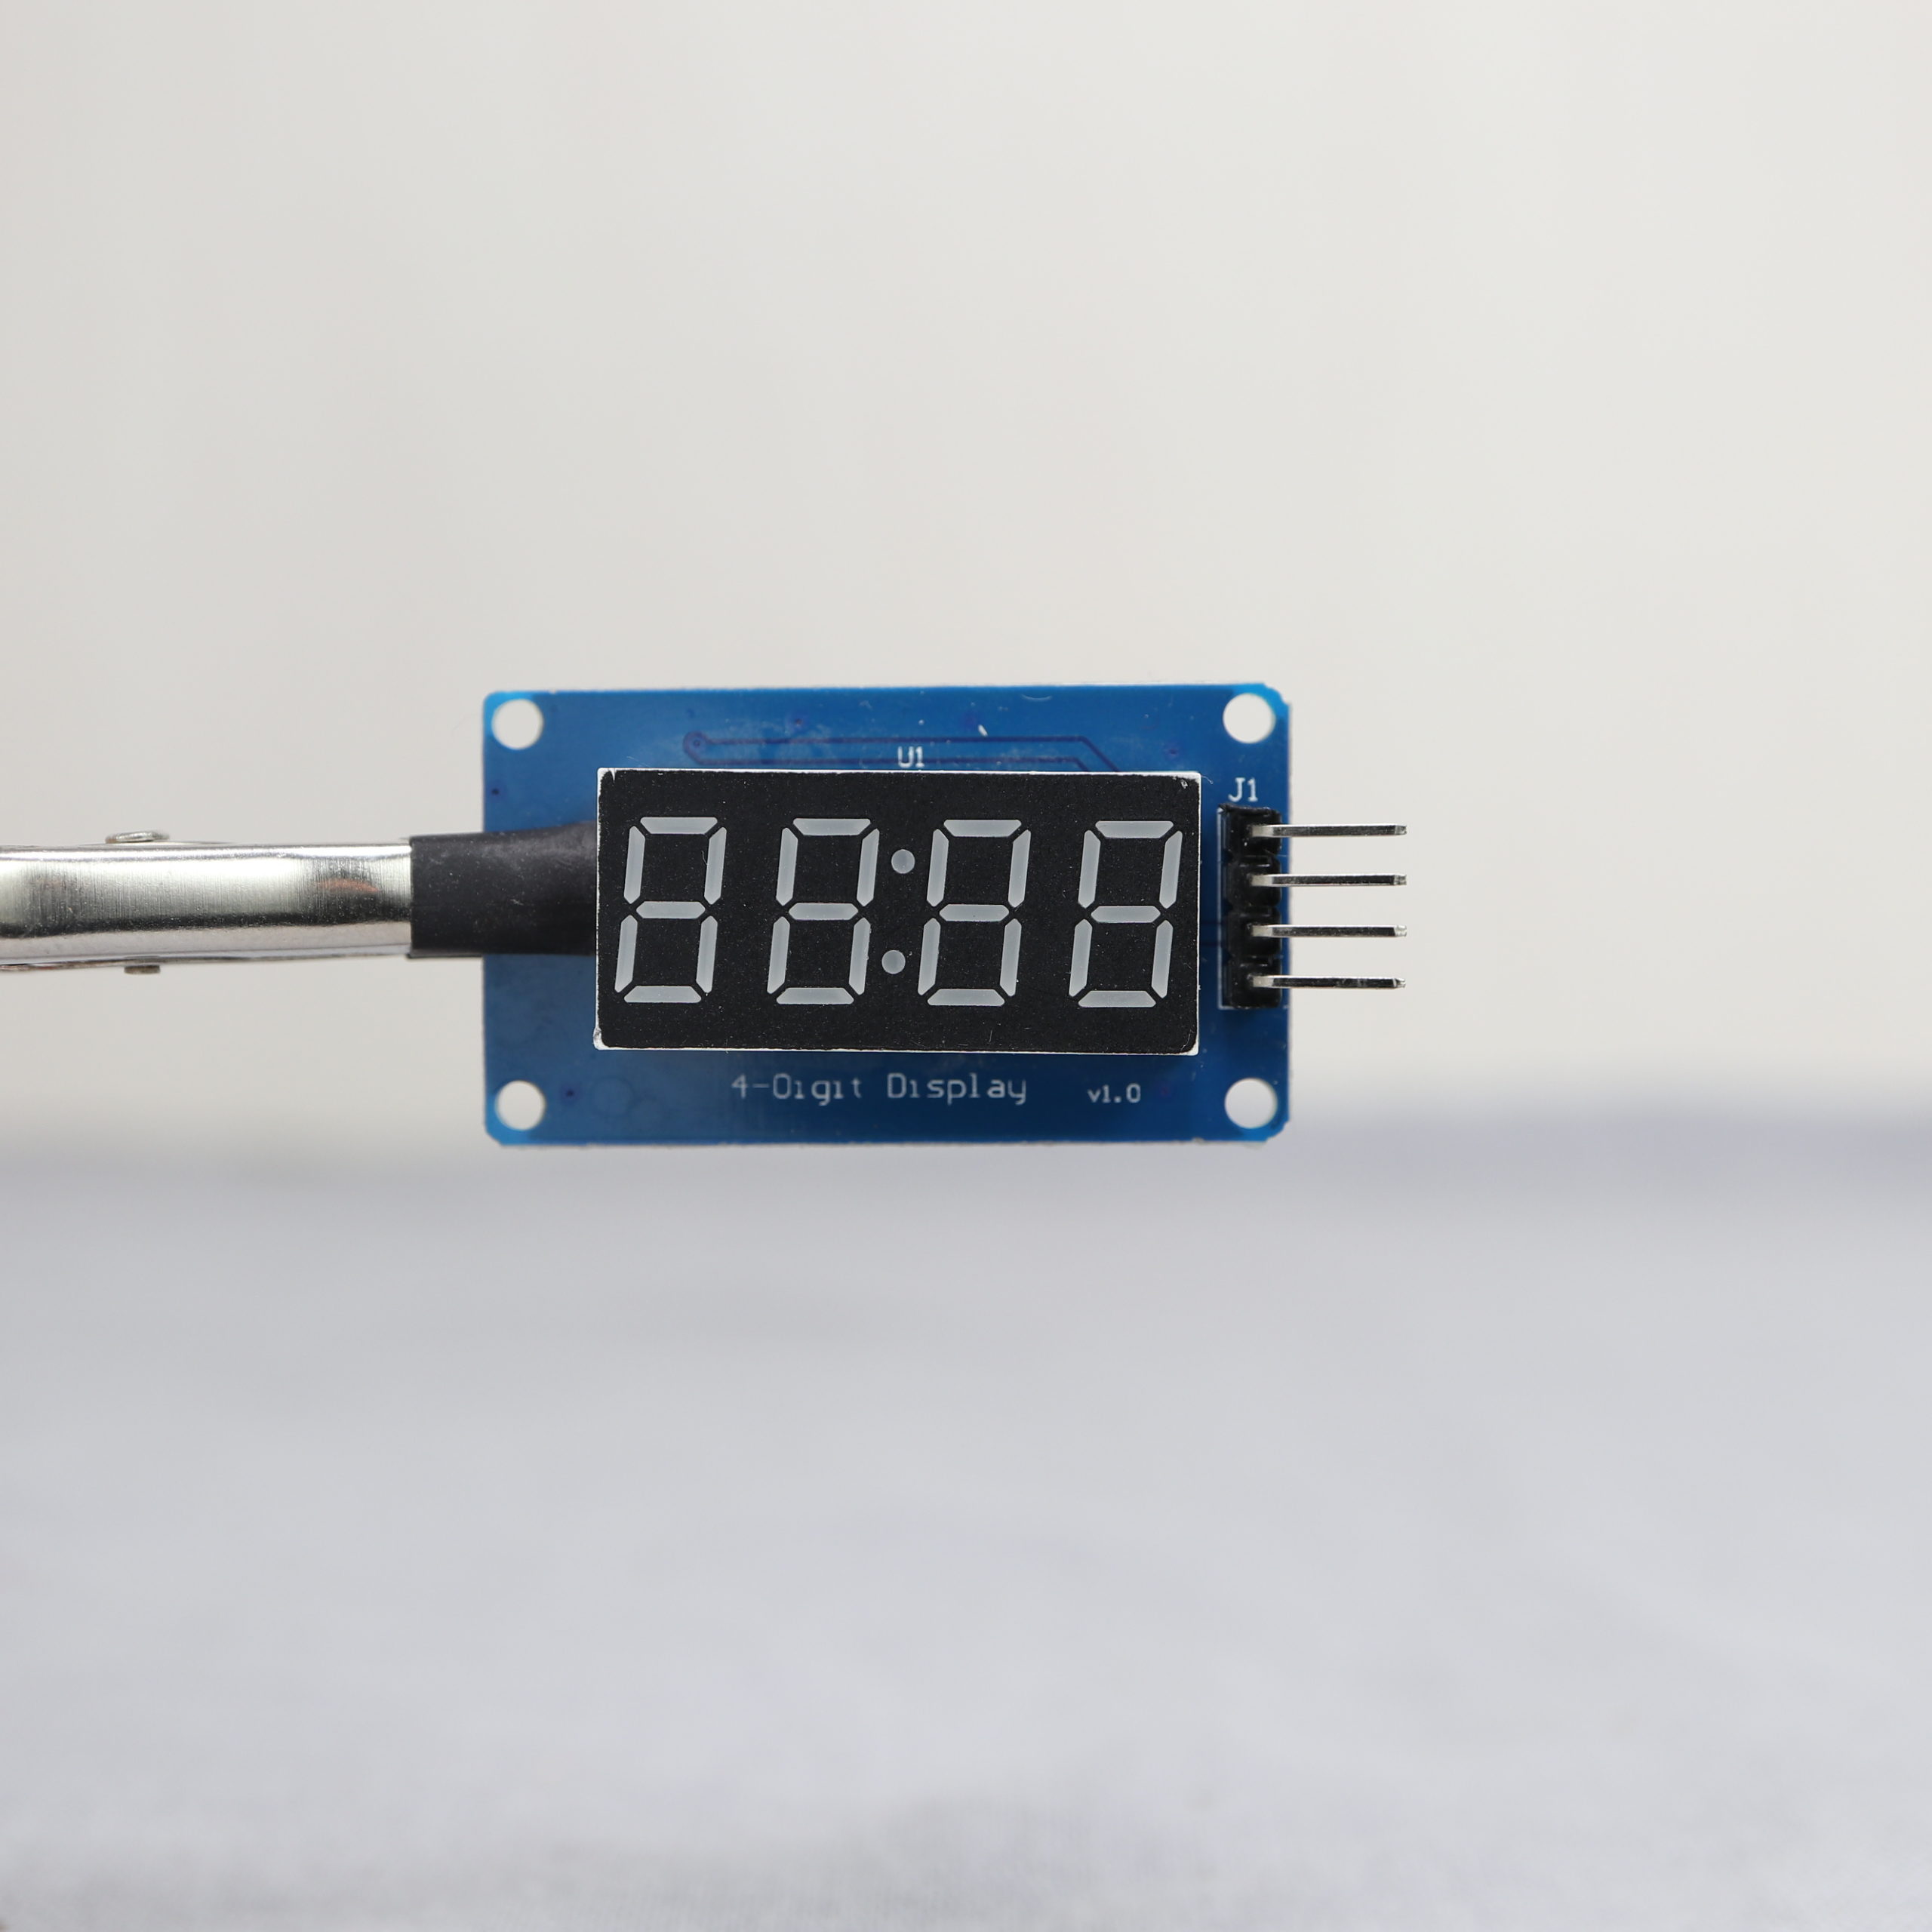
4-Digit Display Module
The module contains only two components (besides some resistors and capacitors): a TM1637 chip and a display that shows up to 4 digits and a colon symbol.
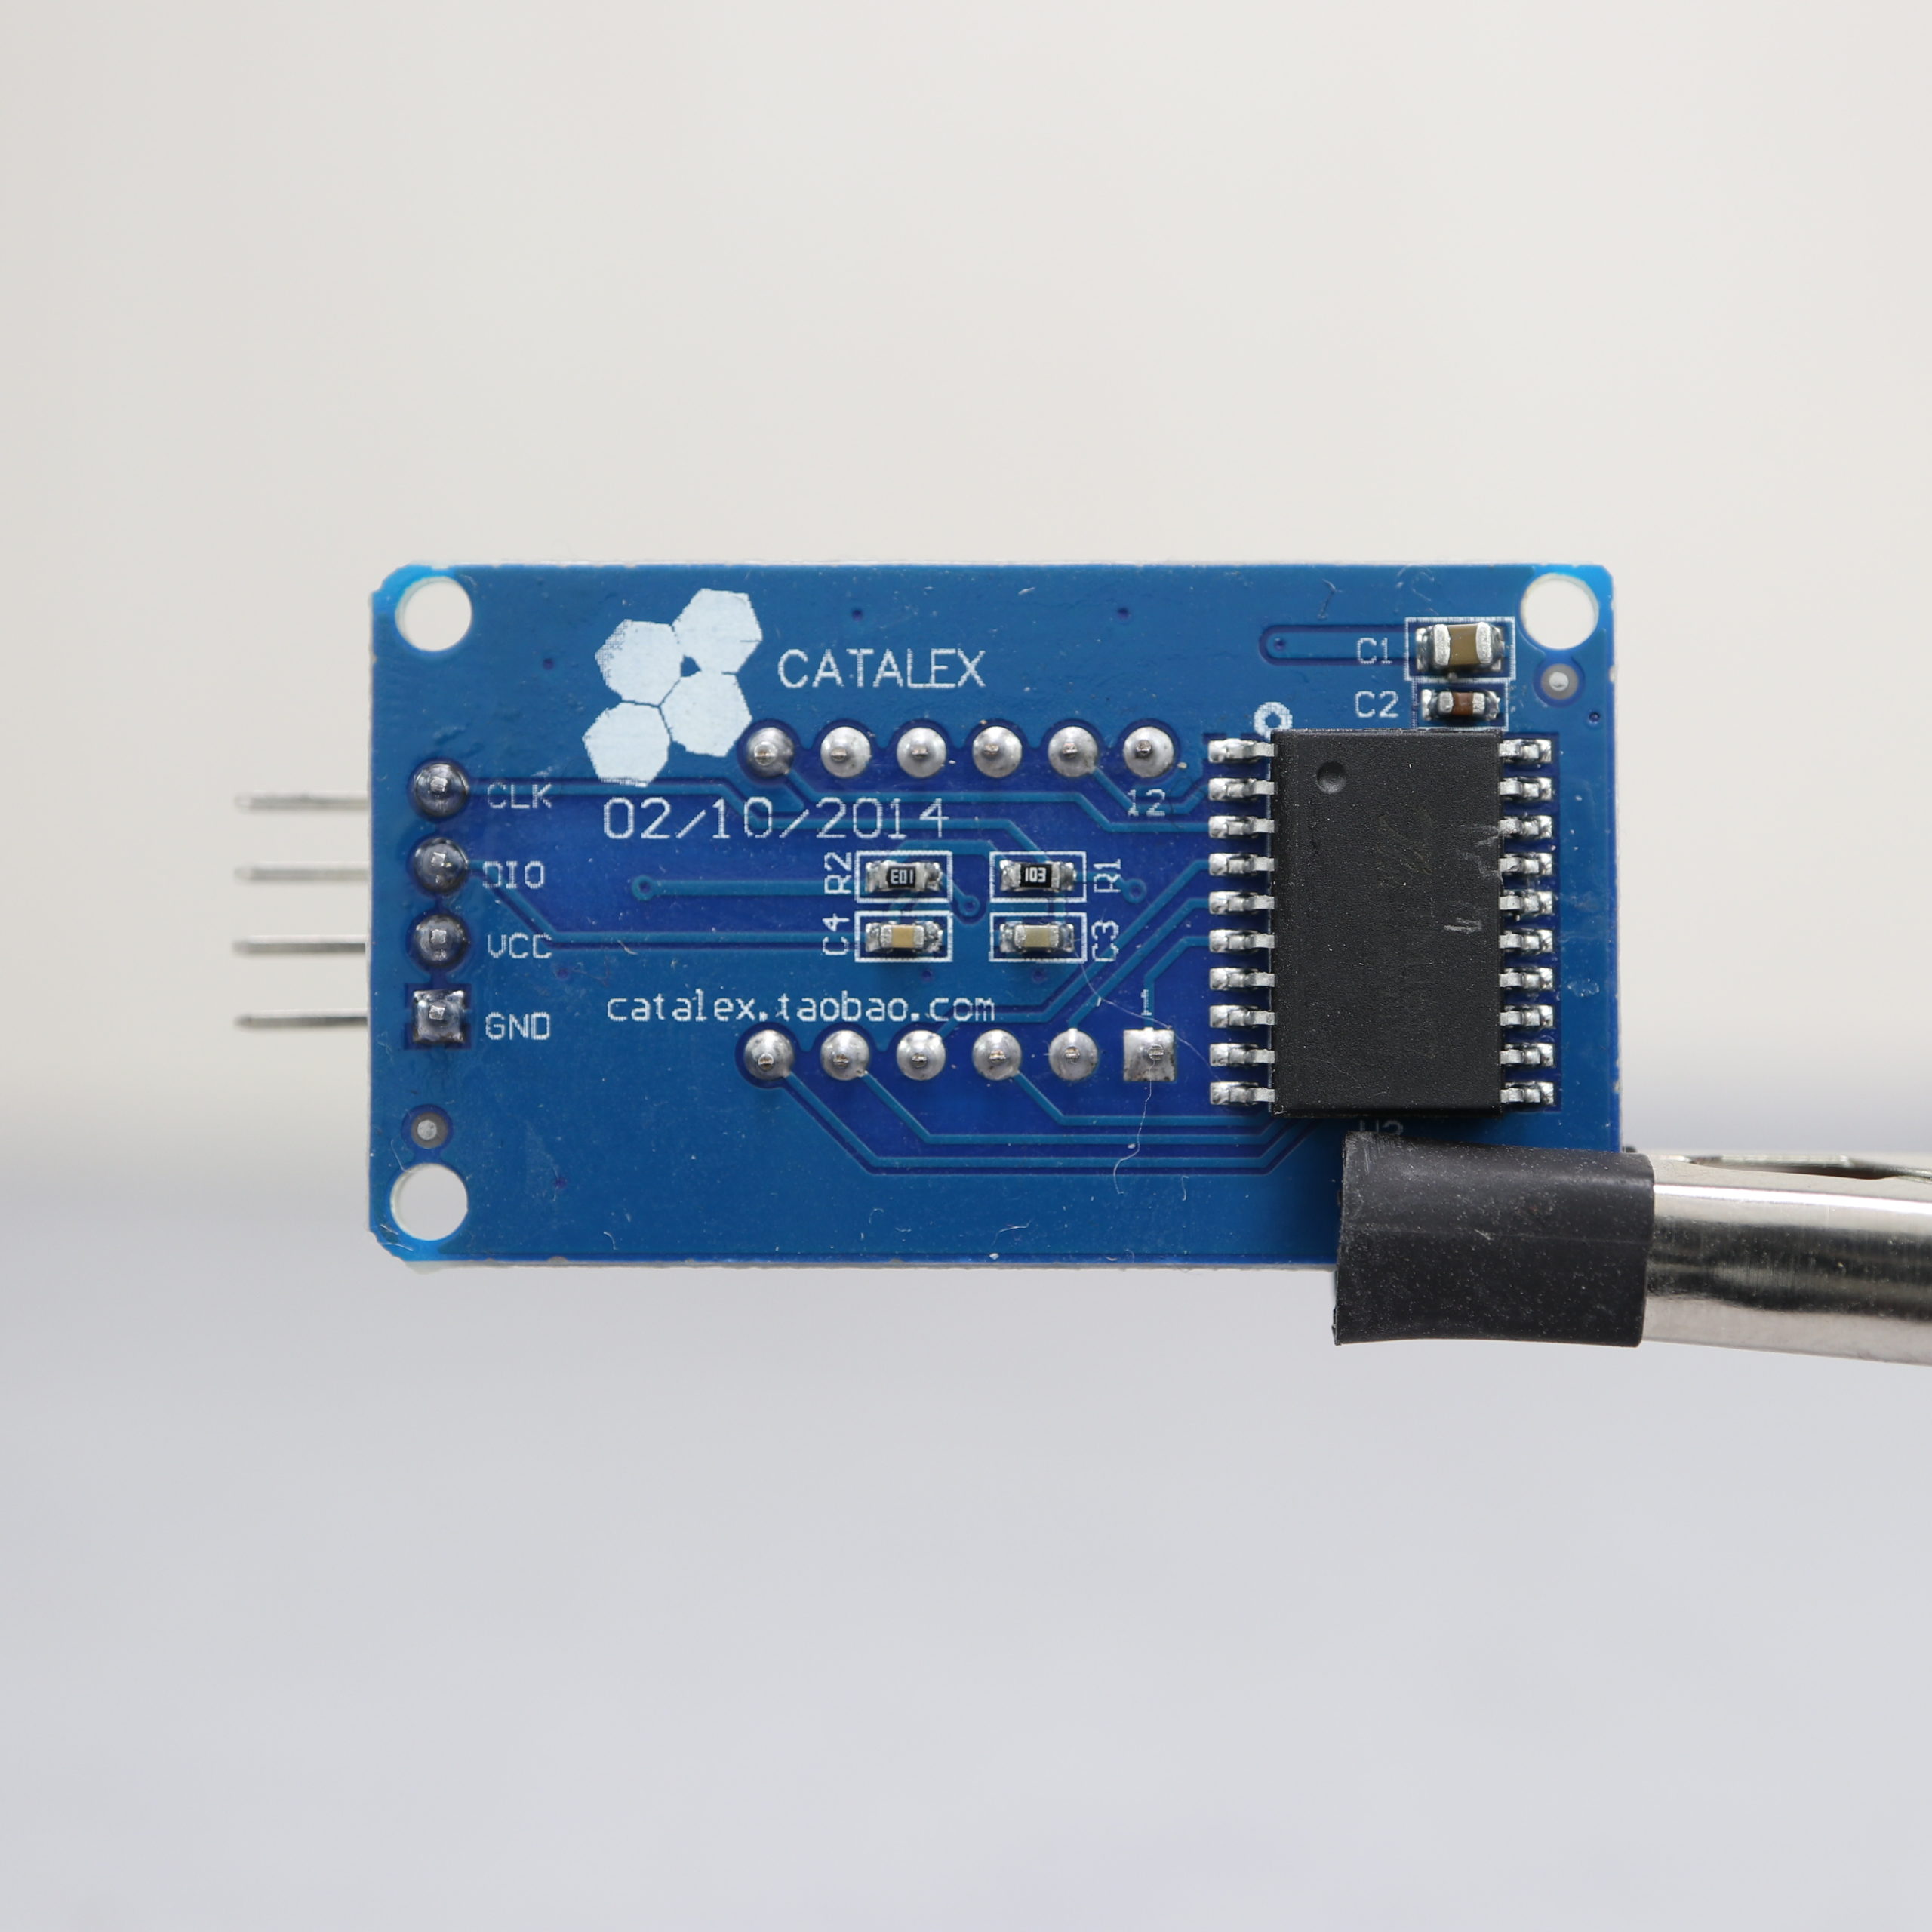
The module has four pins which are described in the following table:
| Pin name | Description |
|---|---|
| CLK | Clock input |
| DIO | Data Input/Output |
| VCC | Voltage Common Collector / 5V |
| GND | GND |
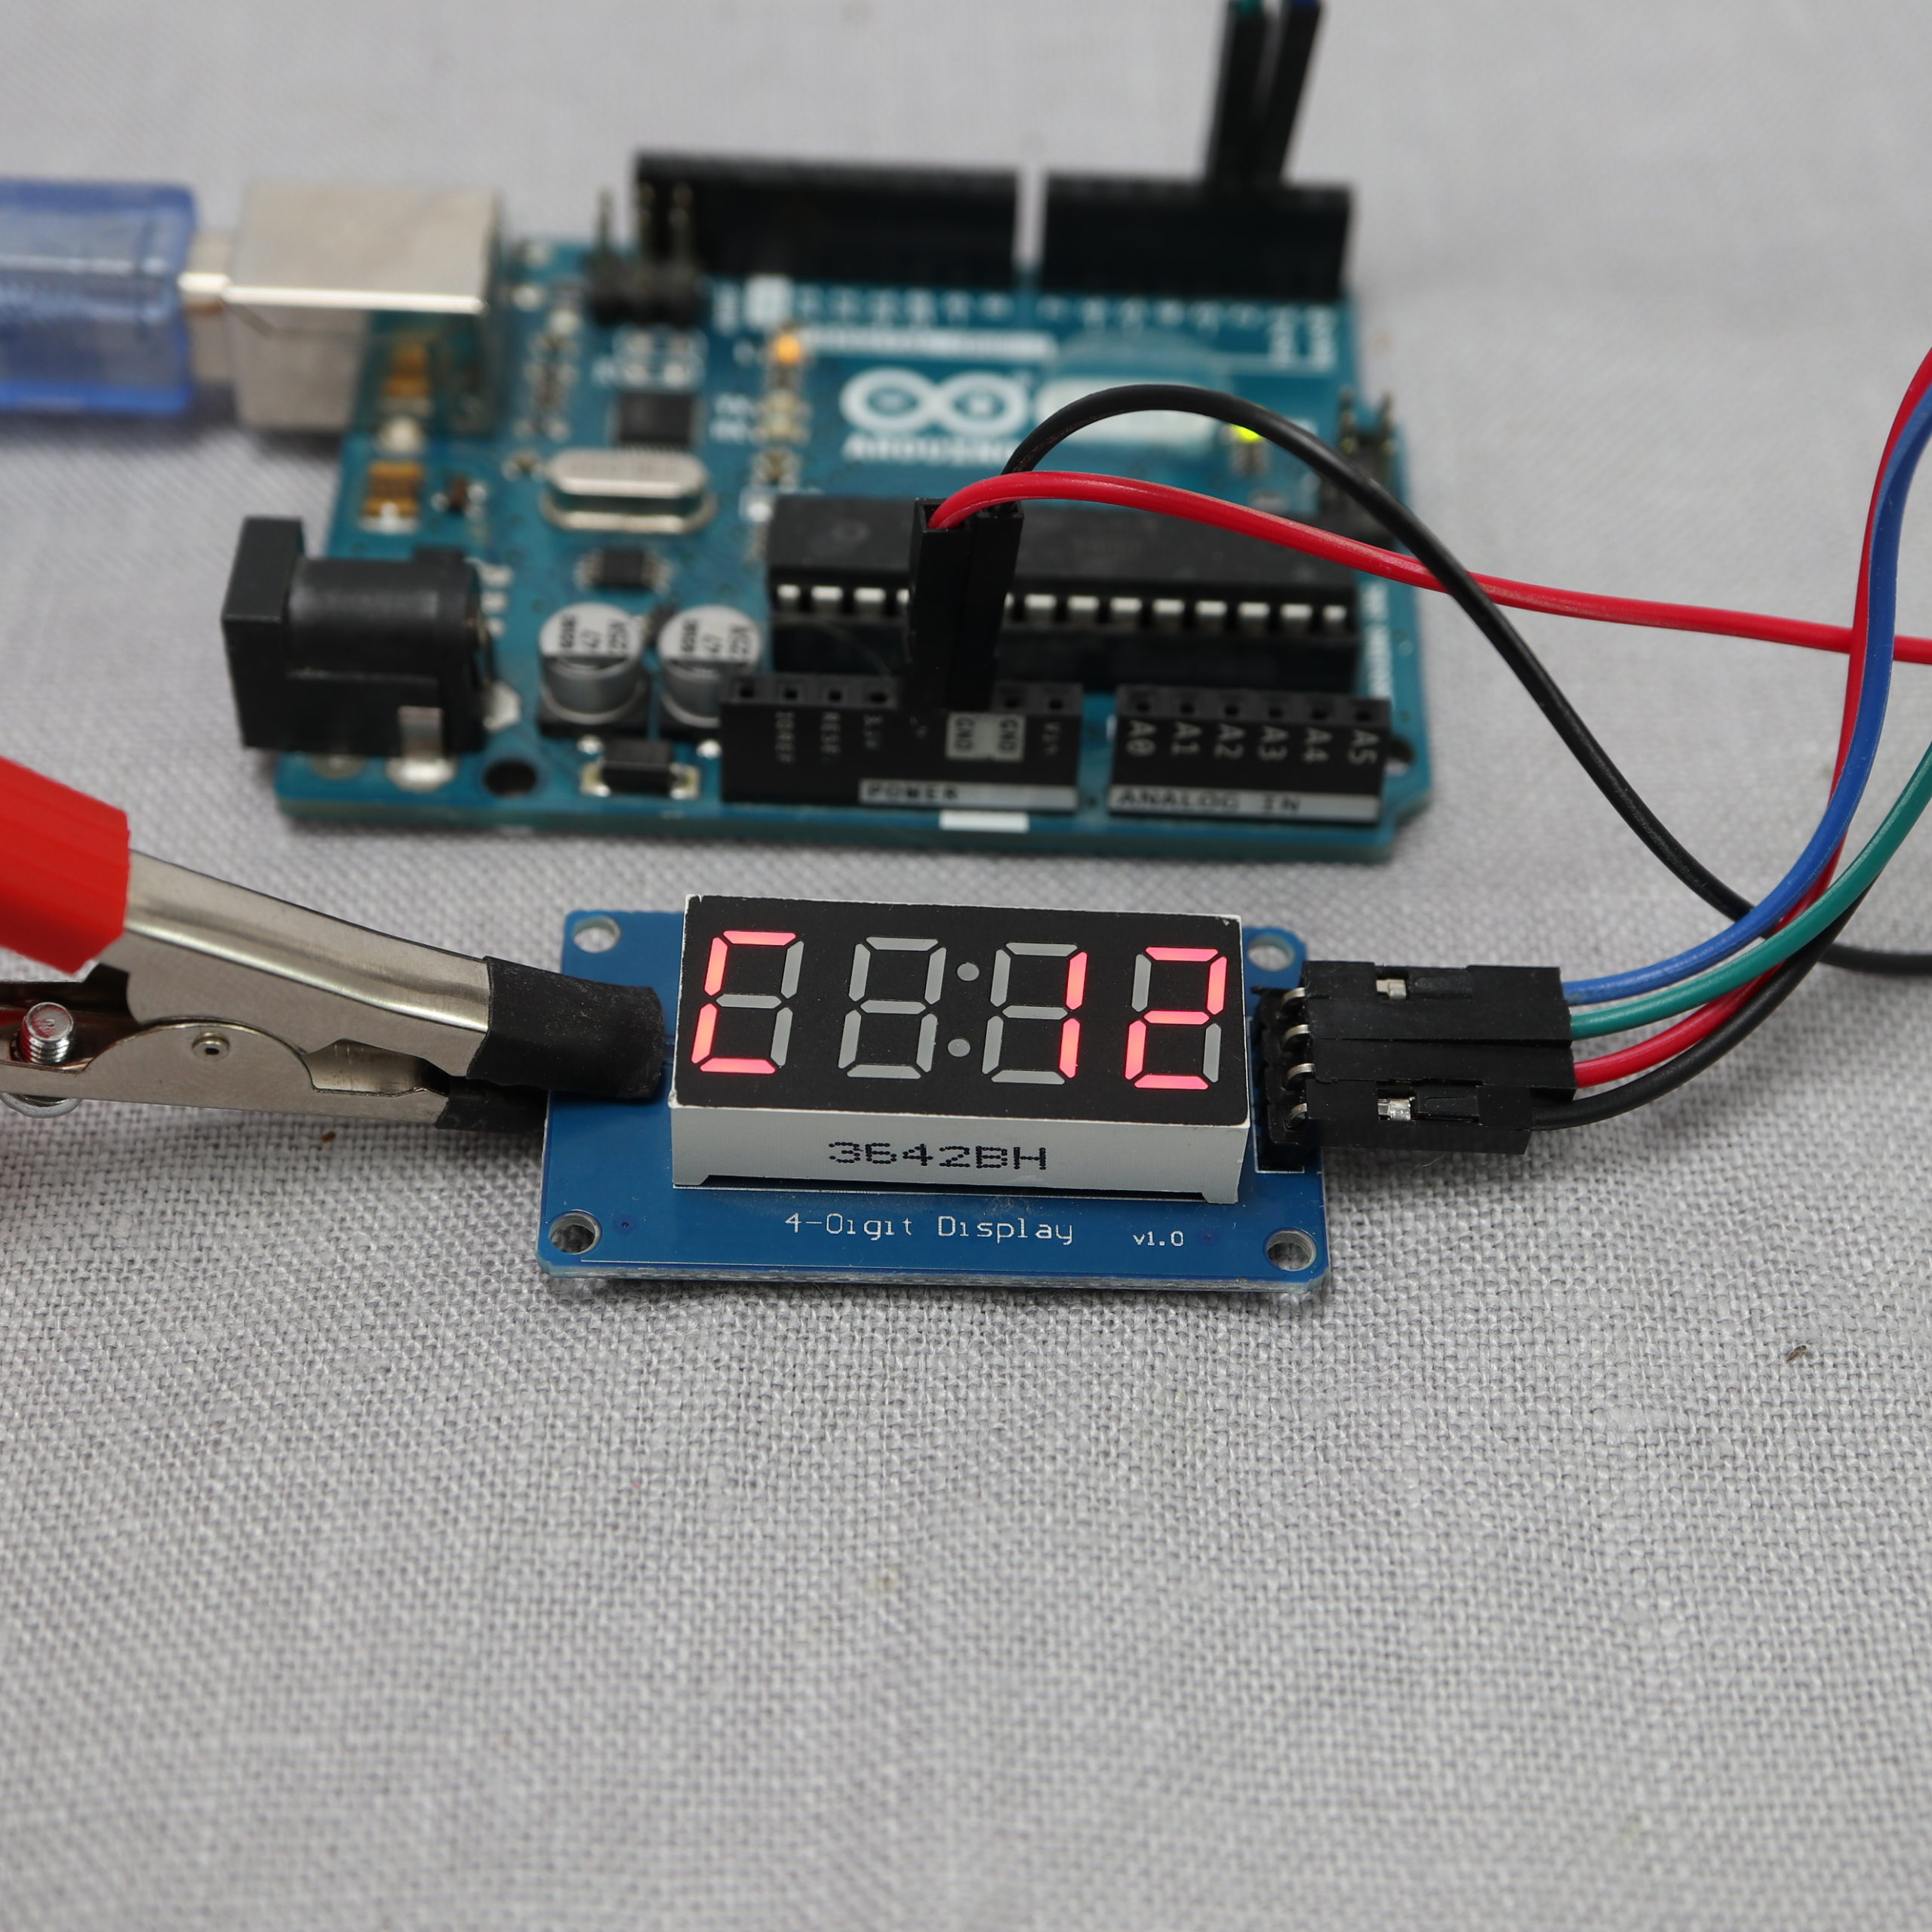
Wiring between TM1637 4-Digit Display Module and Arduino Uno
Due to the simplicity of the module, only four connections have to be wired to the Arduino.
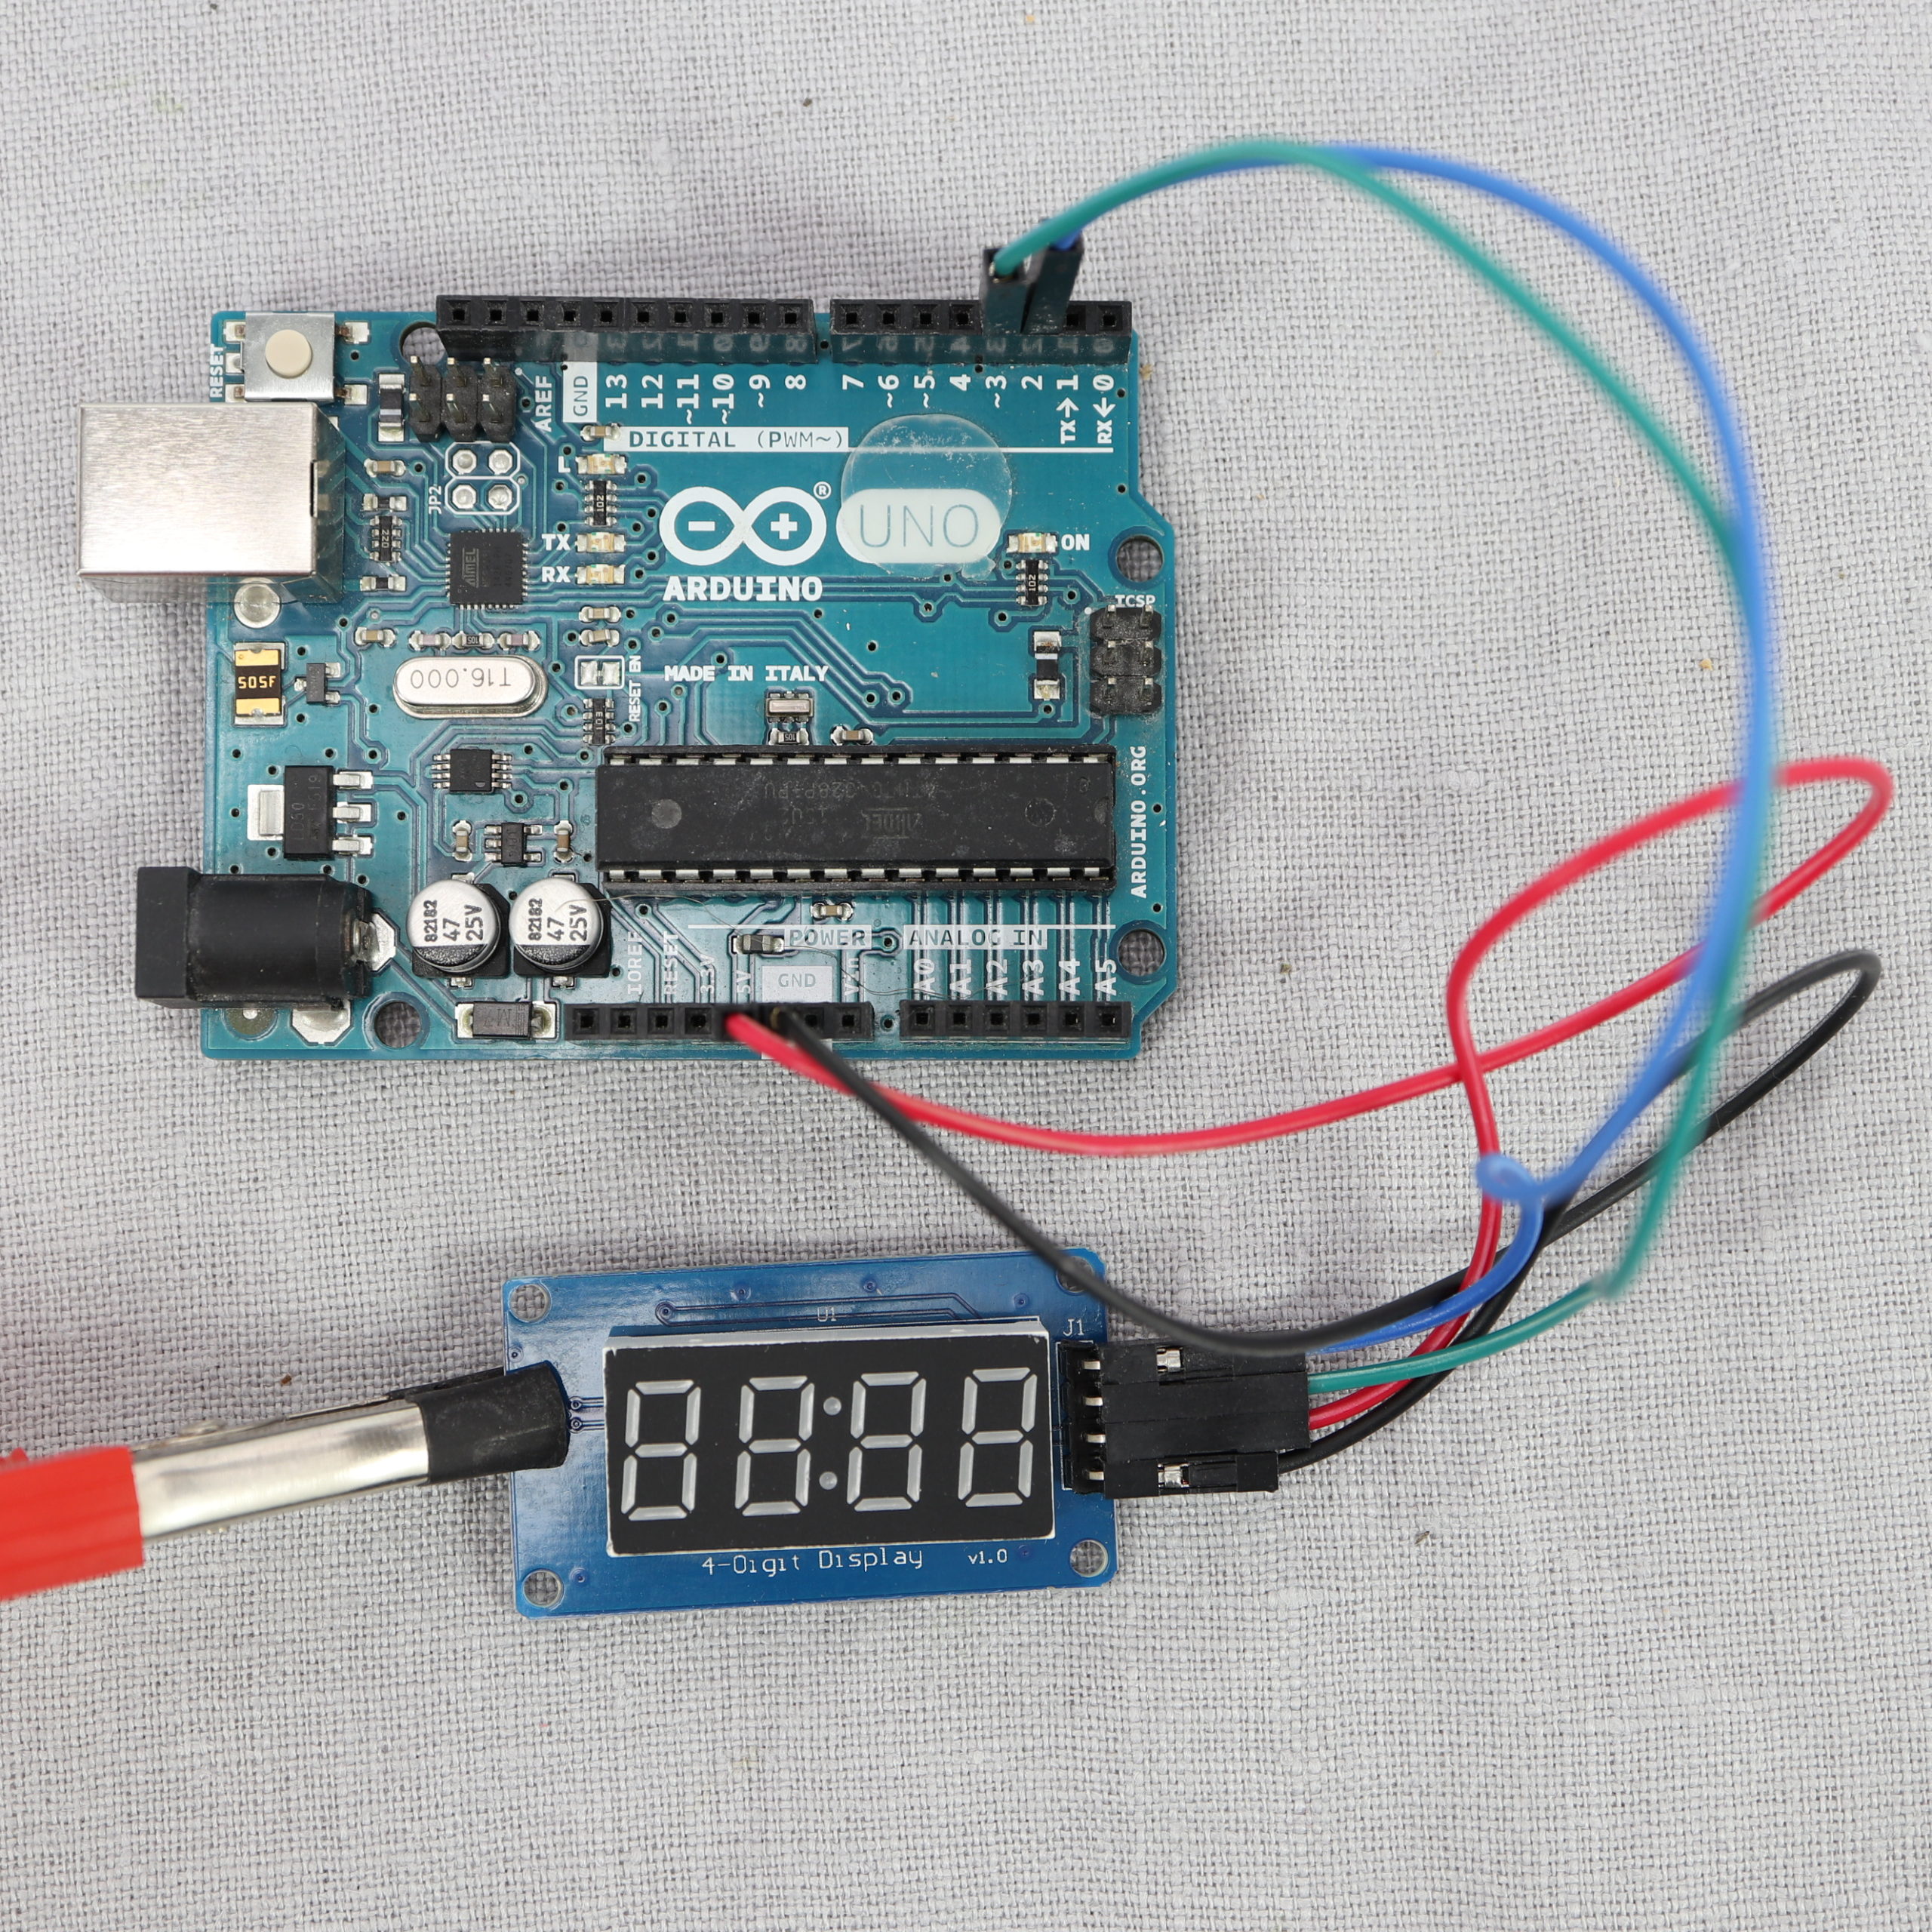
In this tutorial, we make use of the Arduino’s pin 2 and 3 to wire to the CLK and DIO pin of the module. The following table shows all connections:
| 4-Digit Display Module Pins | Arduino Uno Pins | Wire color (in tutorial) |
|---|---|---|
| CLK | Digital 2 | Blue |
| DIO | Digital 3 | Green |
| VCC | 5V | Red |
| GND | GND | Black |
Programming of the TM1637 4-Digit Display Module
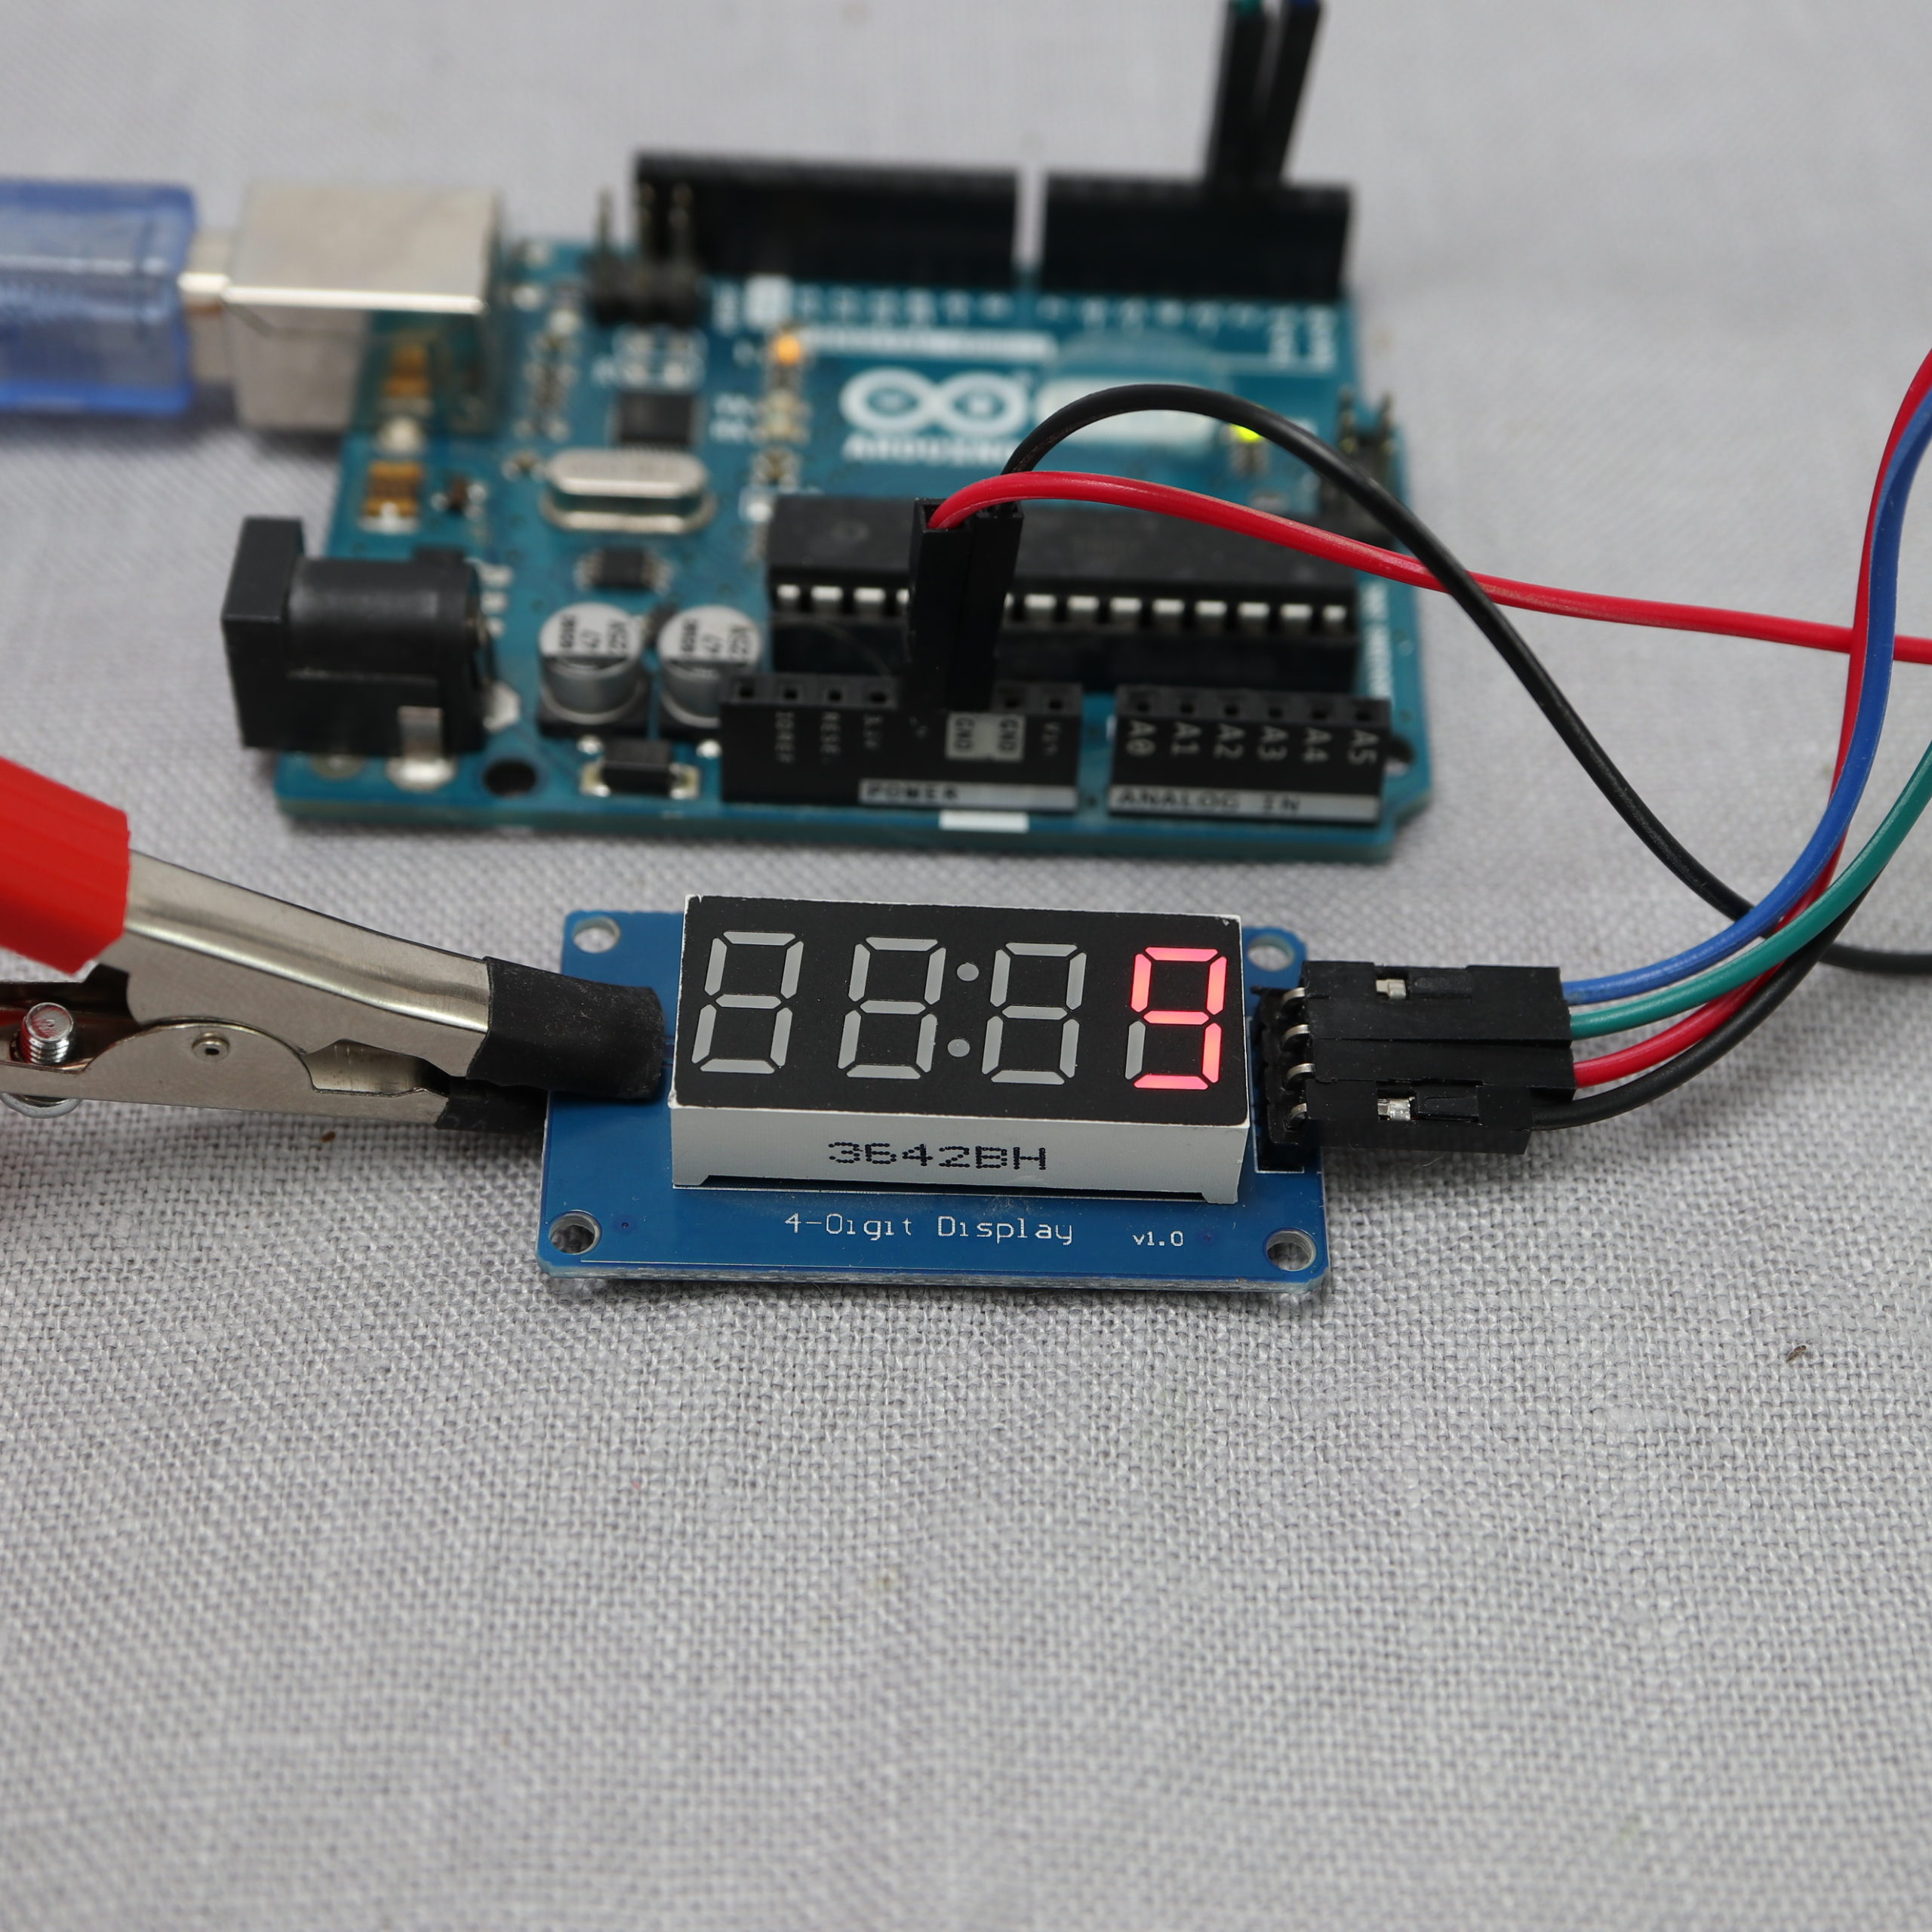
In this tutorial, a very simple application is programmed:
- First, the module displays counting from 0 to 10
- Second, the module displays counting hexadecimal numbers from ‘A’ (Decimal: 10) to ‘F’ (Decimal: 15)
- Finally, the module displays counting of the same hexadecimal numbers. However, this time, the display shows the corresponding decimal numbers at the same time
Before you start with programming, you need to install the TM1637 library. If you use the official Arduino IDE, you find the library in the Library Manager. This tutorial shows only a subset of the library’s capabilities. Have a look at their website to discover more in the official documentation.
At the beginning of the code, an object of type TM1637Display is created which represents the display module. The constructor has two arguments (CLK pin and DIO pin). In the setup function, the display is cleared and the brightness is set to the maximum level (7).
In the loop function, the method “showNumberDec” is called 10 times with the help of a for-loop. As a result, a counting from 0 to 10 is shown on the display. The method is called with only one argument which is the number to be shown.
Then, the display is cleared for the next phase where hexadecimal numbers are counted. Again, a for loop is used. This time, the method “showNumberHexEx” is used. The first argument of the method is also the number to be shown. With the help of the loop function, the method is called with the arguments 10, 11, 12, 13, 14 and 15 — which corresponds to the hexadecimal numbers A, B, C, D, E and F.
Again, the display is cleared for the final phase. As in the second phase, a loop function is utilized. This time, two methods are called:
- The first method is again showNumberHexEx. This time, more arguments are handed over to the method. The second argument is for setting dots and colons on the display. The argument is set to its default value zero (no dots or colons). The third argument can be used to show leading zero values. The argument is also set to its default value zero (no leading zeros). The remaining two arguments are more interesting and are for setting the length and starting position. The shown hexadecimal values have a length of on digit. Therefore, the value is set to ‘1’. The position is set to ‘0″ which corresponds to the outermost left position.
- The second method is showNumberDecEx and has basically the same arguments than the first method. The argument values are basically the same except for the 4th (length) and 5th argument (starting position). The length is set to ‘2″, since the shown hexadecimal values correspond to decimal values with two digits. The position is to set to ‘2’ which corresponds to the 3rd 7-segment unit. Since the length is ‘2’, the decimal numbers will be shown on the 3rd and 4th unit which corresponds to the outermost right position.
As a final step, the display is cleared (and then the routine starts again).
/*
MIT License
Copyright 2021 Michael Schoeffler (https://www.mschoeffler.com)
Permission is hereby granted, free of charge, to any person obtaining a copy of this software and associated documentation files (the "Software"), to deal in the Software without restriction, including without limitation the rights to use, copy, modify, merge, publish, distribute, sublicense, and/or sell copies of the Software, and to permit persons to whom the Software is furnished to do so, subject to the following conditions:
The above copyright notice and this permission notice shall be included in all copies or substantial portions of the Software.
THE SOFTWARE IS PROVIDED "AS IS", WITHOUT WARRANTY OF ANY KIND, EXPRESS OR IMPLIED, INCLUDING BUT NOT LIMITED TO THE WARRANTIES OF MERCHANTABILITY, FITNESS FOR A PARTICULAR PURPOSE AND NONINFRINGEMENT. IN NO EVENT SHALL THE AUTHORS OR COPYRIGHT HOLDERS BE LIABLE FOR ANY CLAIM, DAMAGES OR OTHER LIABILITY, WHETHER IN AN ACTION OF CONTRACT, TORT OR OTHERWISE, ARISING FROM, OUT OF OR IN CONNECTION WITH THE SOFTWARE OR THE USE OR OTHER DEALINGS IN THE SOFTWARE.
*/
/*
 * This is an example program that is part of a TM1637 Arduino tutorial.
 * The program controls a TM1637-based module in order to display the counting decimal and hexadecimal numbers.
 */

#include <TM1637Display.h>

#define CLK 2 // Pin for Clock Input
#define DIO 3 // Pin for Data Input/Output

TM1637Display display = TM1637Display(CLK, DIO); // Creates display object that represents the TM1637 display

void setup() {
  display.clear(); // clears the display
  display.setBrightness(7); // parameter can range from 0 (lowes brightness) to 7 (highest brightness)
}

void loop() {

  for (int i = 0; i < 11; i++) {
    display.showNumberDec(i); // shows a decimal number on the display
    delay(1000);
  }

  delay(1000);
  display.clear();
  delay(1000);

  for (int i = 10; i < 16; i++) {
    display.showNumberHexEx(i); // shows a hexadecimal number on the display
    delay(1000);
  }

  delay(1000);
  display.clear();
  delay(1000);

  for (int i = 10; i < 16; i++) { // shows hexadecimal number + corresponding decimal number
    display.showNumberHexEx(i, 0, false, 1, 0);
    display.showNumberDecEx(i, 0, false, 2, 2);
    delay(1000);
  }

  delay(1000);
  display.clear();
  delay(1000);
}
If you transfer the program to the Arduino Uno, you should see the different numbers on the display.

Conclusion
In summary, TM1637-based modules are very helpful if you have the right applications for it. Moreover, these modules are also very useful if you want to learn some advanced techniques. It is also possible to control each segment of the display by setting bitmasks (not shown in this tutorial).